Marker Images and Detection
Importing our images
Now, we will need to set up our ARSession Config to track and detect our 2D images and markers.
11. Creating Marker Images

Creating an AR marker app for a card game, for example, can help in bringing static cards to life. We can add dynamic 3D animations, sound effects, and other interactive elements by overlaying visual cues or user interfaces directly onto the cards. We can even save the cards into a book or collection. This fusion of physical cards and digital effects can add an additional layer to the experience, allowing players to do more beyond the c ard's surface and into a shared augmented space. By enabling multiplayer or remote play through AR scenes between players, we can change how card games are experienced with and without physical cards. Ultimately, AR marker applications can open up the possibilities for hybrid and digital experiences.
Designing Cards in Unreal
Designing a card template in Unreal Engine means we will be building a reusable Blueprint or UI layout that can represent cards in our game. This may invovle physical (scanned via AR marker) or digital (displayed on mobile screen).
Here are some resources on how to get started:
| Resource | Description |
|---|---|
| Building Your UI | Creating widget templates |
| Unreal Motion Graphics UI Designer (UMG) | Creating dynamic elements |
| Widget Blueprints | Creating widget blueprints |
| Card Structs | Using structs for card creation |
Designing with 2D Design Software
We may design our cards using a variety of design tools outside of Unreal Engine.
| Resource | Description |
|---|---|
| Tabletop Simulator (Steam) | Make your own online board games |
| Card Creator (Steam) | Card generation software |
| Squib | A Ruby DSL for prototyping card and board games |
| Reliquary | A card and board game design tool for Figma |
| Dextrous | Card prototyping for tabletop games |
| Adobe Creative Cloud | Include Adobe Photoshop, Illustrator, and InDesign |
| Canva | Board and card game templates |
12. Importing Marker Images
Once you have your marker images, make sure you have the following:
- Dimensions of your cards in cm
- Cards and markers are created in
RGBA - Exported as .png or .jpg or similar format
In your Content Drawer, create a new folder for your marker images. Right click and select Import to and select your images. Your images will import as Textures.
Start with clicking on one of the Textures you just imported. In the Details panel, set the following:
- Navigate to
Compression / Compression Settingsand then set it toUserInterface2D (RGBA) - Navigate to
TexturewheresRGB should be checkedTrue` - Navigate to
Level of Detail / Texture Group: Change the dropdown selection toUI
Do the same for each Texture you imported.
13. Configuring Marker Images
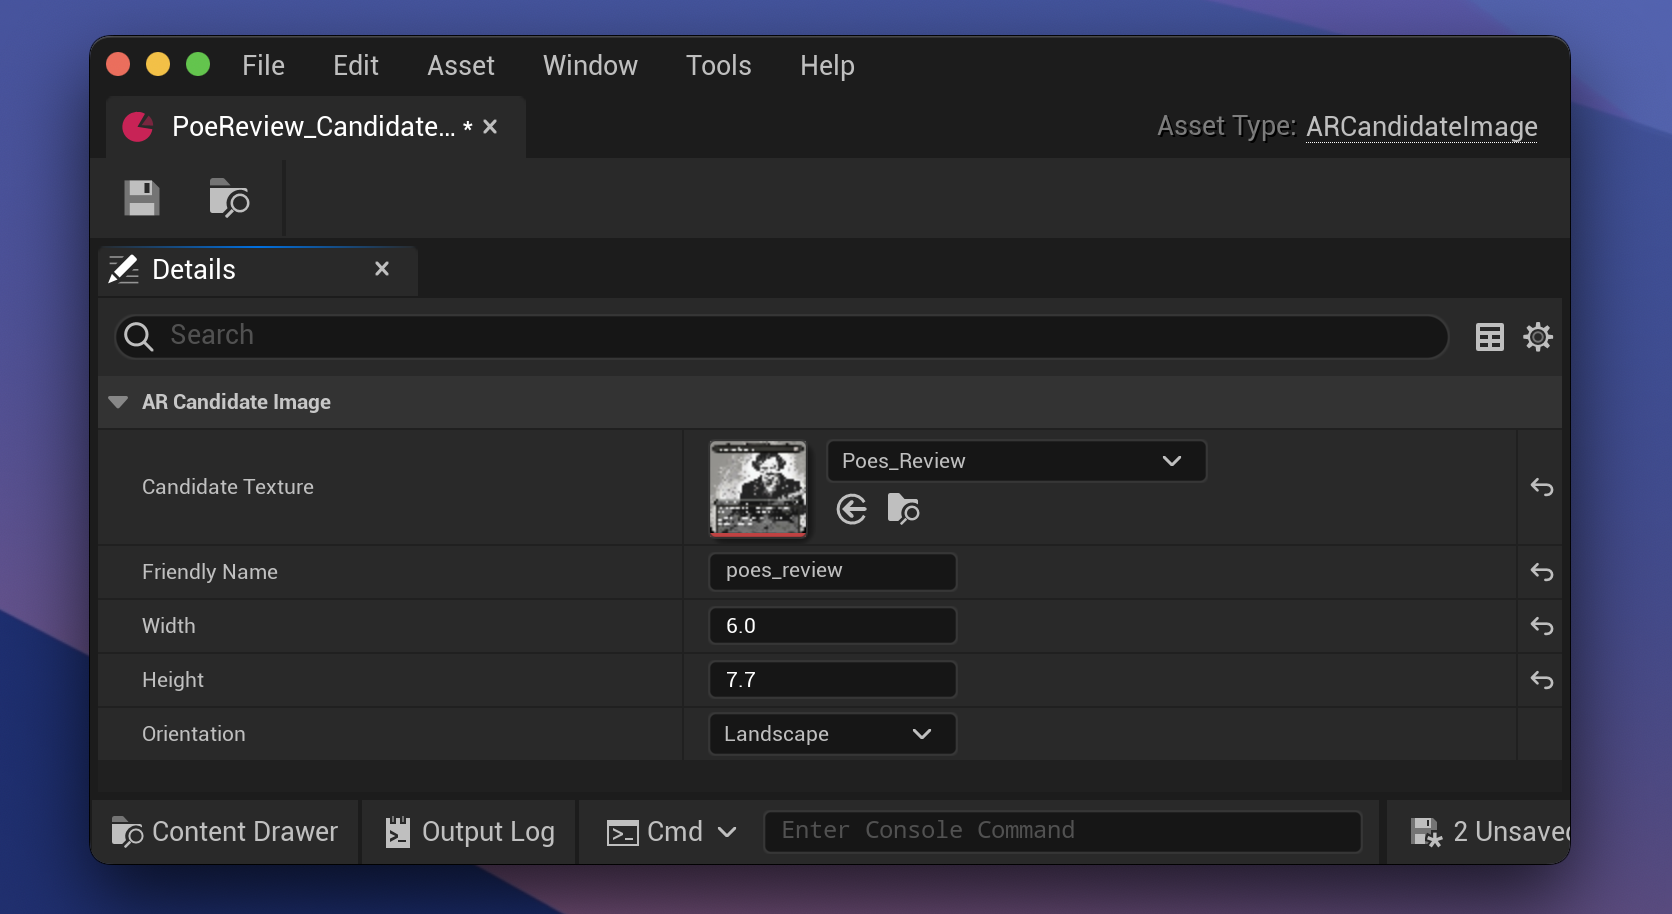
- Creating CandidateImages: In your Content Drawer, navigate to
Miscellaneous / Data Asset / AR Candidate Image. Name your Candidate Image to something like[Image Title]_CandidateImage. - Candidate Image Specs: Open up the CandidateImage you created. Give it a
Friendly Name,Candidate Texture: An image you uploaded,Width and Height: Should be in cm.
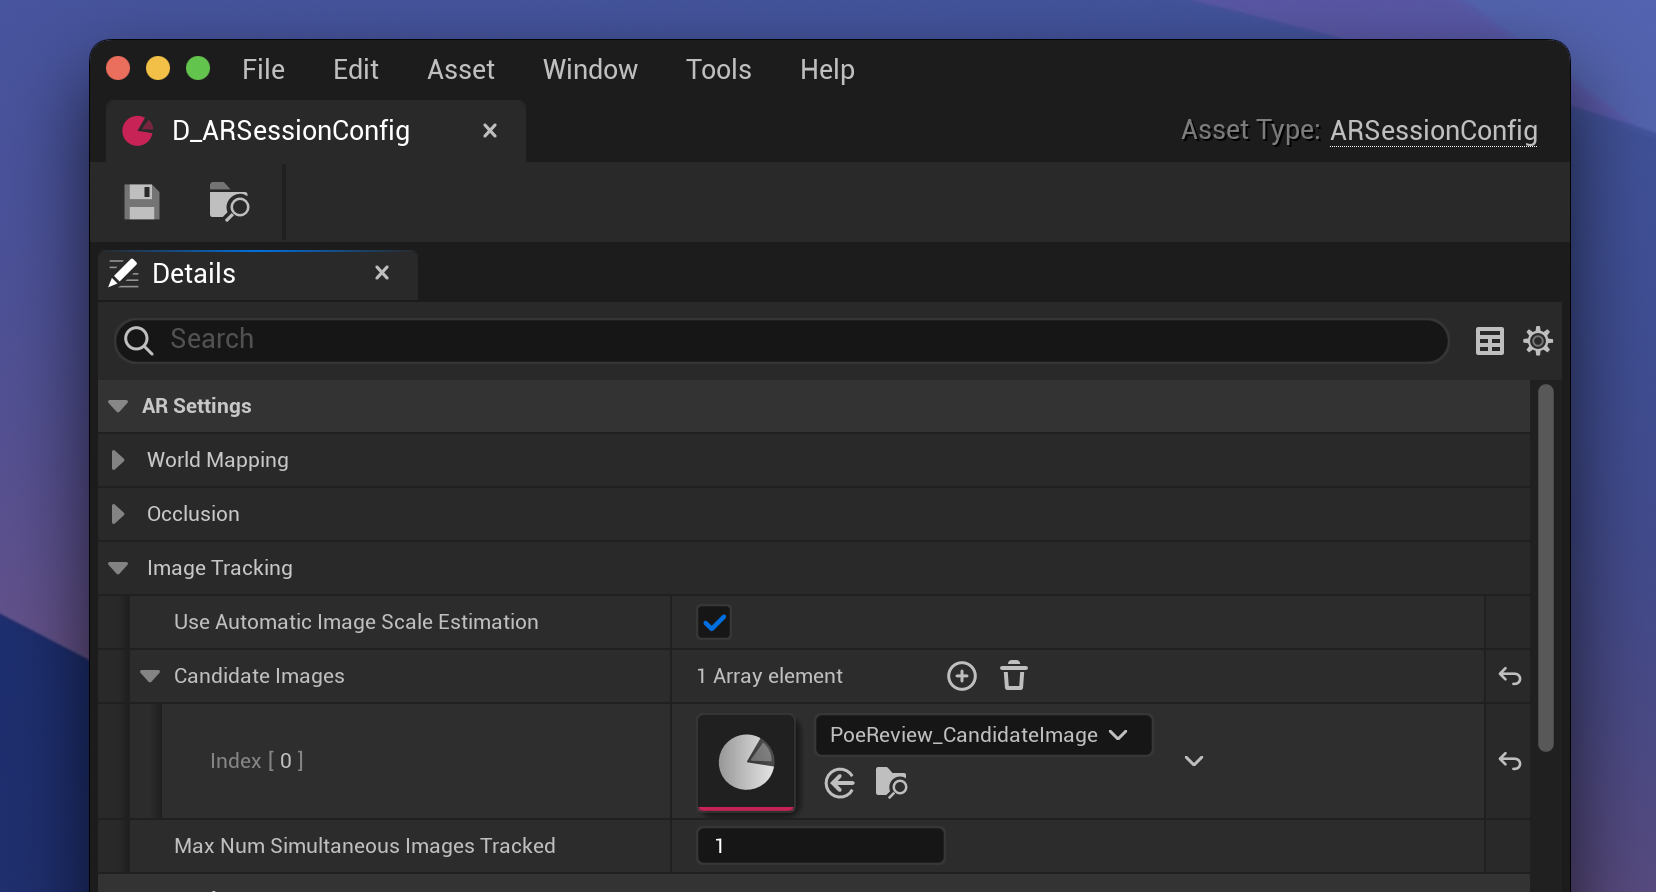
14. Configure AR Session Config
Now that we have our marker images set up, we will link our images to our D_ARSessionConfig. Open up your AR Session Config where under the Details panel, add all of your Candidate Images.