Getting Started
Developing an AR mobile application for iOS/Android with Unreal Engine 5
Let's start creating a marker app with Unreal Engine! By the end of this section, you will have an AR application that detects markers and displays a 3D model. This guide supports both iOS and Android build processes.
1. Setting Up
We will be creating our application with Unreal Engine 5 (UE5). Any version of UE5 should work. If you don't have UE5, please download the Epics Games Launcher, create an Epic Games account, and then install a version of Unreal Engine. For Mac users, you can only build to iOS devices such as the Apple Vision Pro, iPhone, iPad, Mac. Users on a Windows machine can only build to Android devices. If you do not have compatible hardware, please work together with other students in the class on this homework assignment. Please note the required hardware and materials below:
- A cord that connects from your computer to your phone
- If you are working on a Windows, you will need to work with an Android phone
- If you are working on a Mac, you will need to work with an iPhone/iPad
Download Unreal Engine
Download Unreal Engine and download the Epics Games Launcher.
2. New Project with Template
In your Unreal Project Browser, navigate to the Games tab. Next, create a new project with the Handheld AR template.
If you would like to start completely from scratch with an empty project or with an existing project you have worked on before, create a project that supports Blueprints and the Target Platform set as Mobile. With your new project, you should have a main level that would hold the contents of our scene.
Augmented Reality in Unreal Engine
Read about AR with UE5 at Real-time Explainers.
3. Project Files and Documentation
Once you have your project open, there are a couple of important files that you will need in order to make your AR Marker application.
D_ARSessionConfig: The AR Session Config defines the features used in the AR session such as the images used and the video quality. With Unreal's AR Template, the AR Session Config can be found under theHandheldARfolder.BP_ARGameMode: The Game Mode Base defines the game being played, its rules, scoring, and other facets of the game type.BP_ARPawn: A Pawn is an actor that can be 'possessed' and receive input from a controller. This Pawn is responsible for initialization, building and updating the virtual scene, and handling the user's input.BP_ARPlayerController:
Augmented Reality Development Documentation
Find more guides, references, and the documentation at Unreal Engine Developer Documentation.
4. Scene Setup in the Outliner
In the Outliner window, delete everything except for the DirectionalLight and SkyLight. Next, create a new empty Basic/ Actor object at (0, 0, 0) and name it TrackedParent.
Within TrackedParent, begin with a 3D cube by adding Shapes/ Cube also at (0, 0, 5). In order for the 3D cube to be nested within TrackedParent, it must be set to Movable in Mobility.
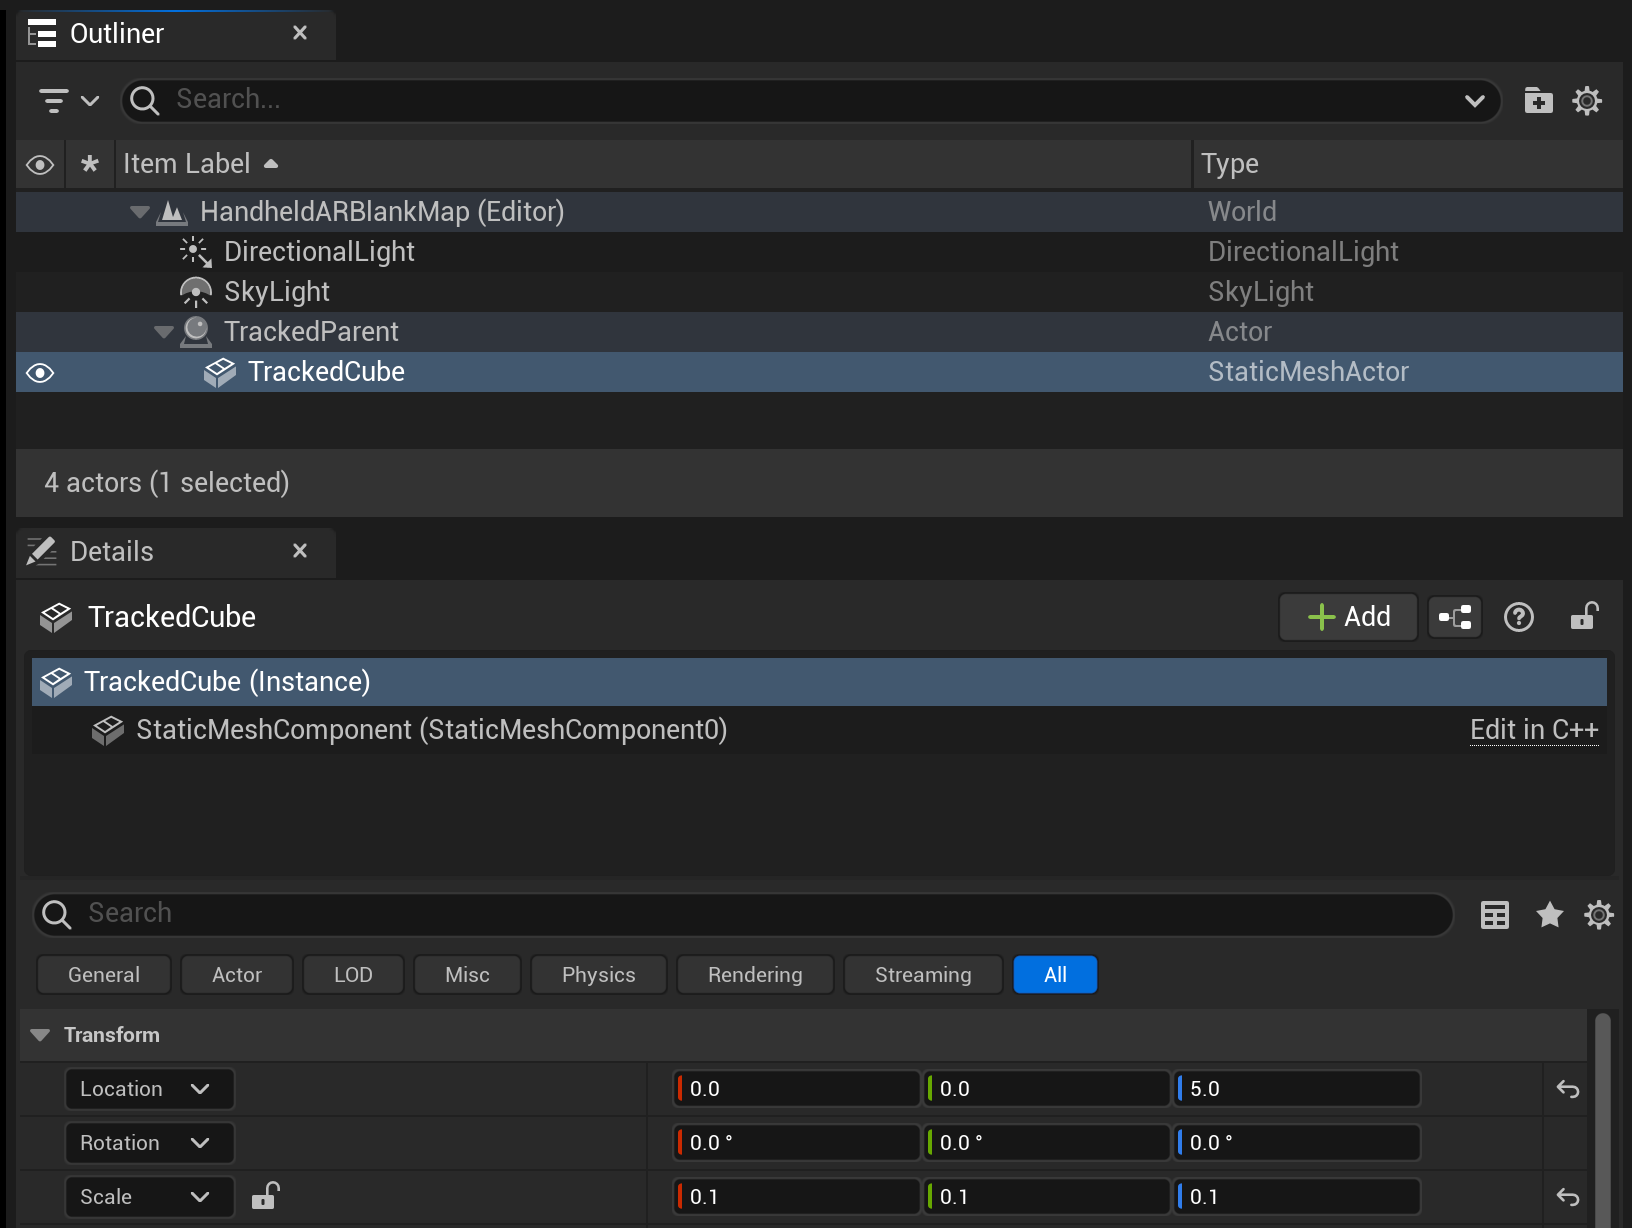
Finally, we will adjust the 3D cube's scale to (0.1, 0.1, 0.1). If you have your own 3D model, you may bring it in here and scale it to be around the 3D cube's size.
5. 3D Models and Materials
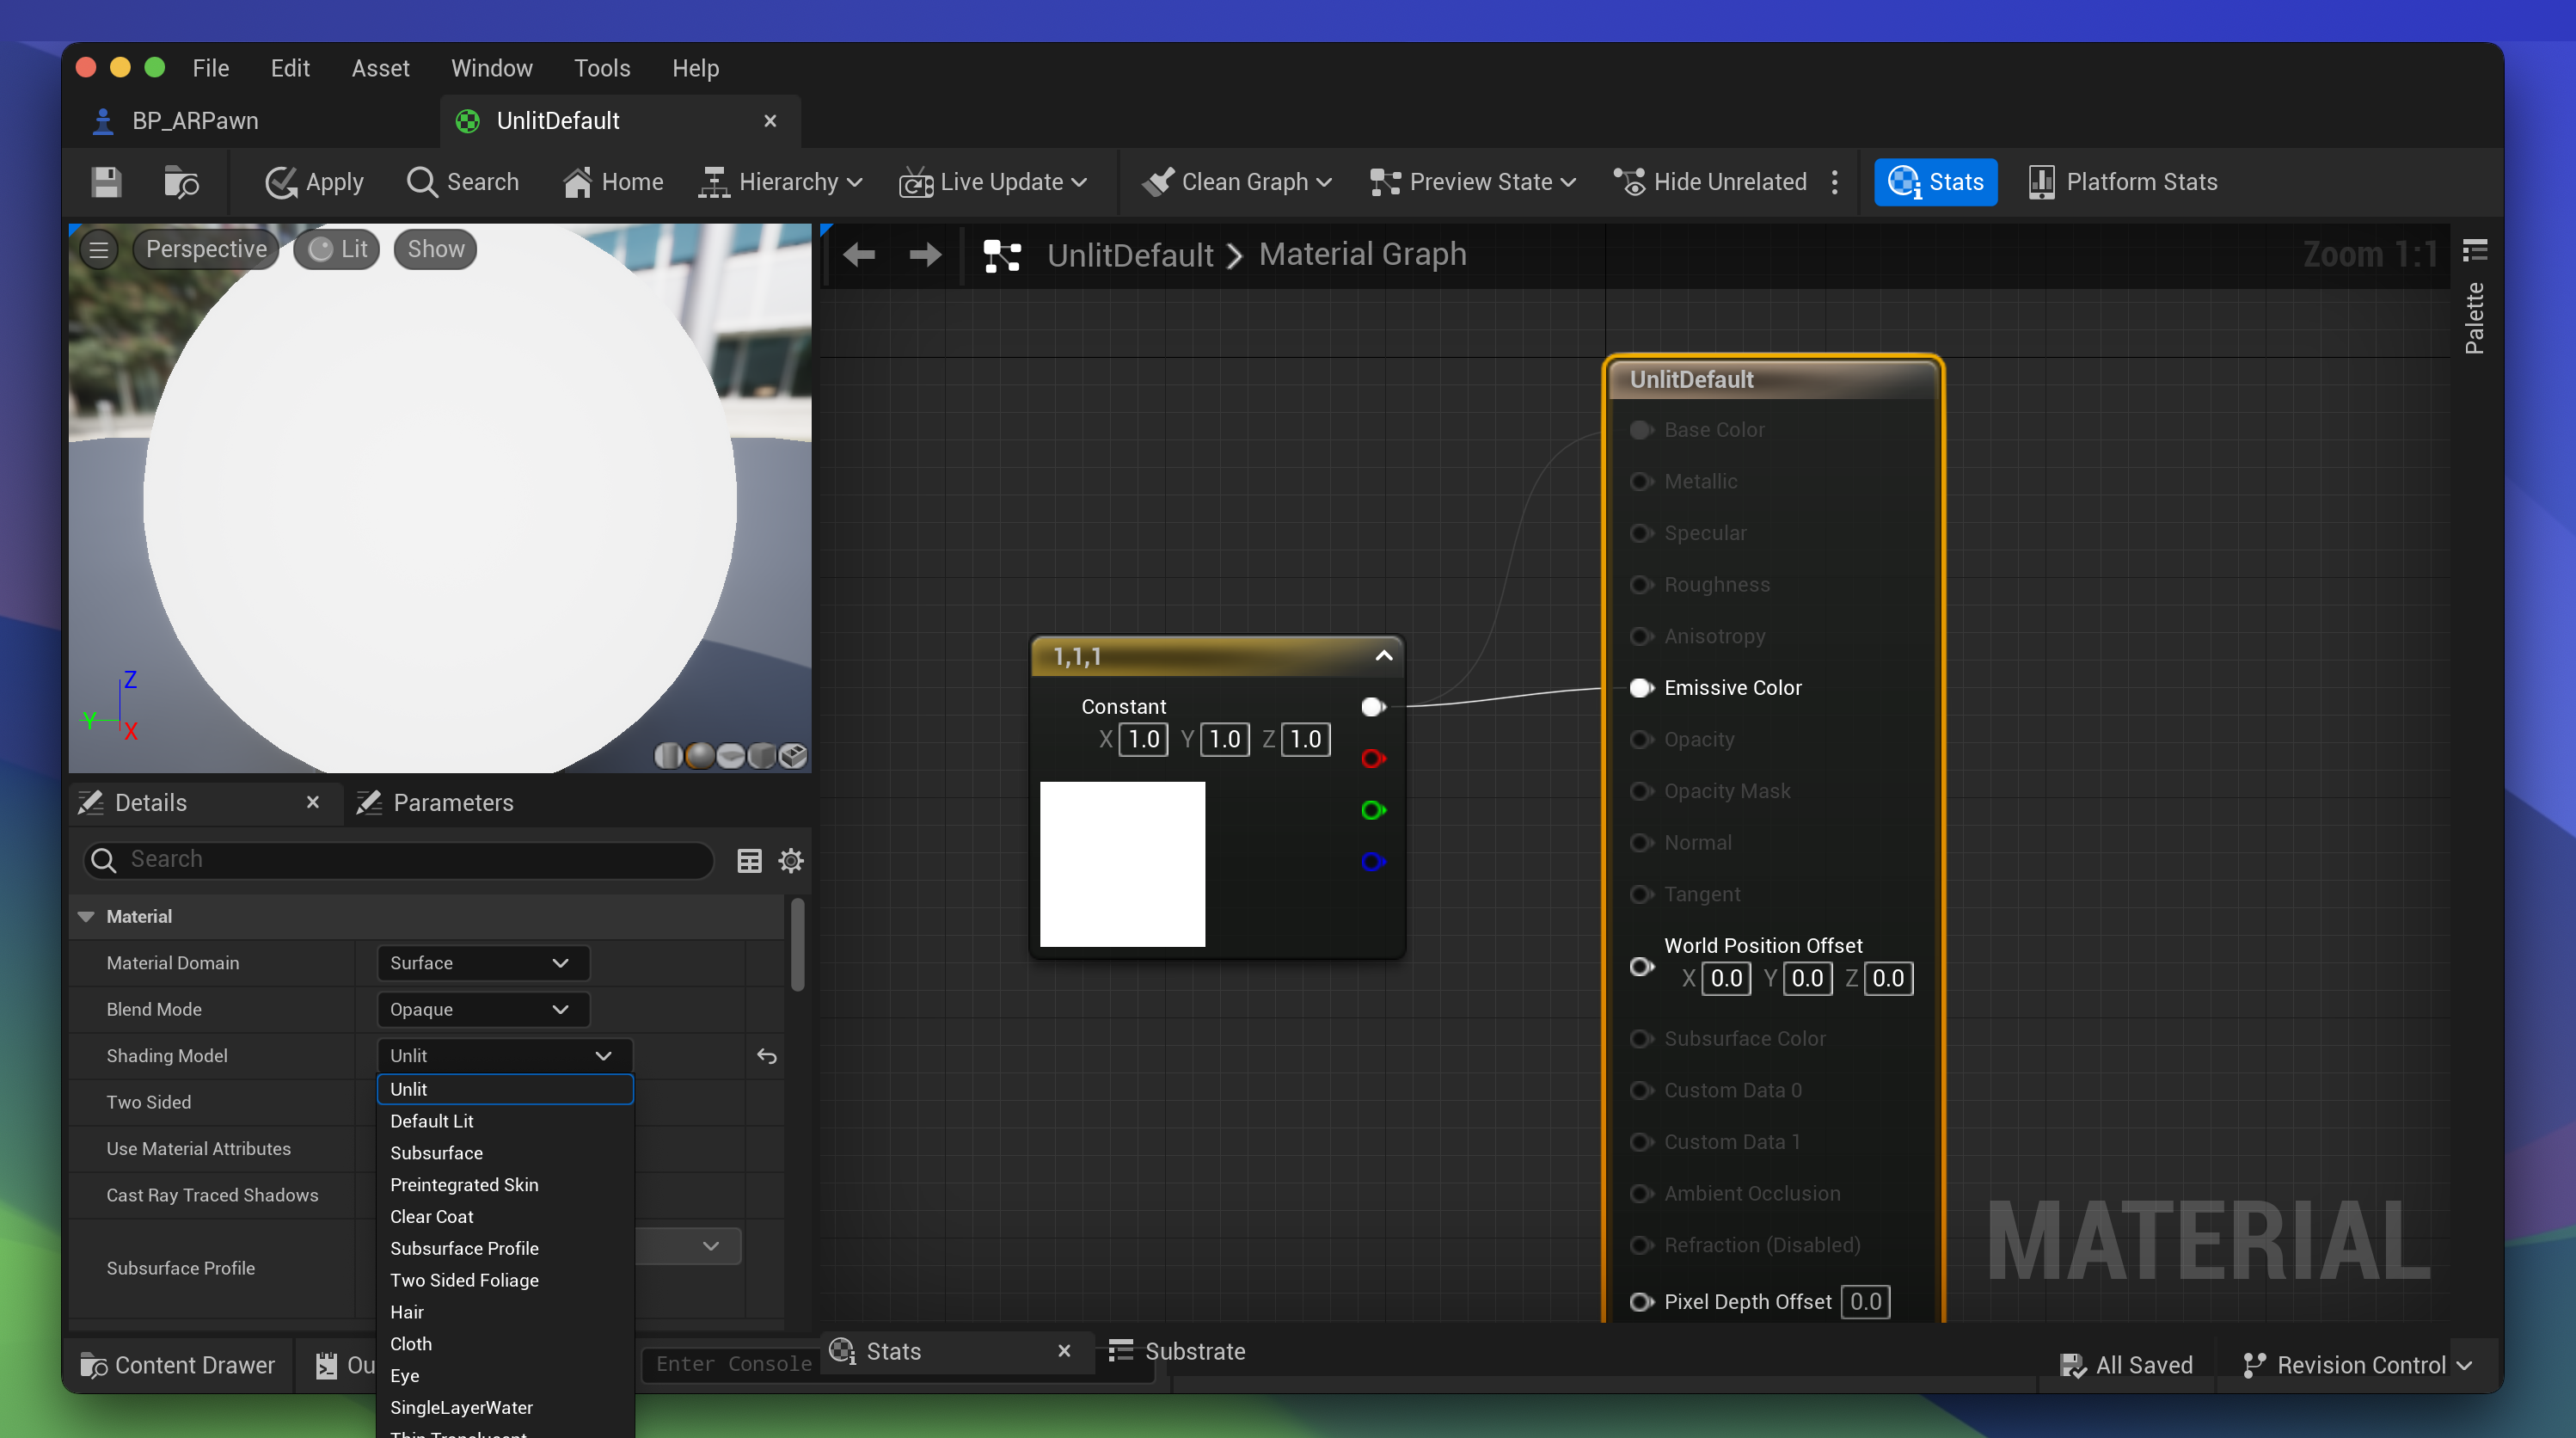
To make sure we are able to see our 3D cube, we will need to add a material. In your Content Drawer, create a new Material and name it Unlit Cube Material. Next, attach it to the 3D cube by dragging the material onto it. Once it is attached, open up the new material you created to link up the material specs and ensure that the Shading Model is set as Unlit.